Our 3 inch diameter base allows you to easily span almost any hole left after removing a faulty valve. A quick simple solution to fix what used to be a fatal problem.
Check out the explanation below to find how how to attach a valve on your new strut bladder.
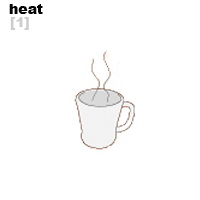
Most OEM valves will peel off easily after being soaked in boiling hot water for a minute or two. Soak only the valve to be removed in almost boiling water.*. If after several attempts in the water the valve does not come off easily, you will need to cut the valve off following the directions for removing the valve with scissors.
*we suggest you first test just the tip of the bladder in the water to make sure the heat of the water won't damage the bladder.
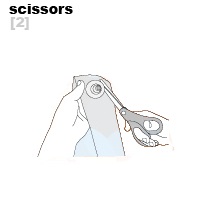
If hot water won't allow you to peel off the valve don't pull too hard. get a pair of scissors and cut carefully around the perimeter of the valve.
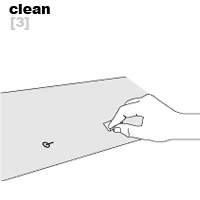
Wipe down the area around the marking(s) with the alcohol wipe provided, ALLOW TO AIR-DRY. the peel and stick valve will not adhere to the bladder if it hasn't been properly cleaned with the alcohol wipe provided.
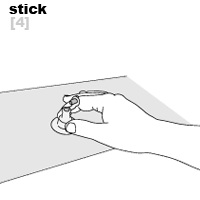
Stick the valve(s) to the bladder paying attention to the marking(s) and the valve arm position. Place the valve over the hole. Do not stick to the inside of the bladder.
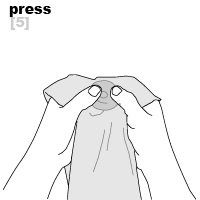
Work around the perimeter of the valve base firmly pressing the valve onto the bladder. flip the bladder over and continue to press the valve on from the backside. work all the visible air bubbles out from below the valve.